This guide will give you step by step instructions to make a tasker scene that shows different data like total number of cases, total deaths, etc,.

Flow:
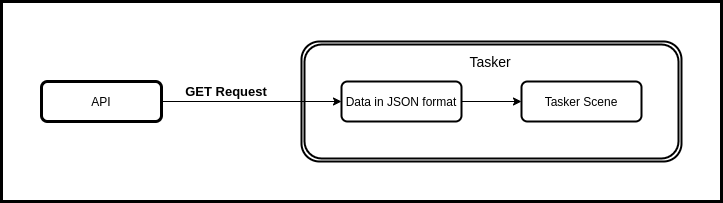
We will get our data from an free publicly accessible API (https://thevirustracker.com/).
The data is returned in a JSON format. We can extract the required data from it using a JavaScriptlet in Tasker.
Once we have the required data, we can create a Tasker scene to our liking to display the information.
The API:
For this project we’ll be using the API provided by https://thevirustracker.com/
You can find the details about the API at https://thevirustracker.com/api
In my case I used the Country Statistics API. This gives data on total cases, total recovered, total deaths, etc,.
Getting the data:
The link to the API looks like this:
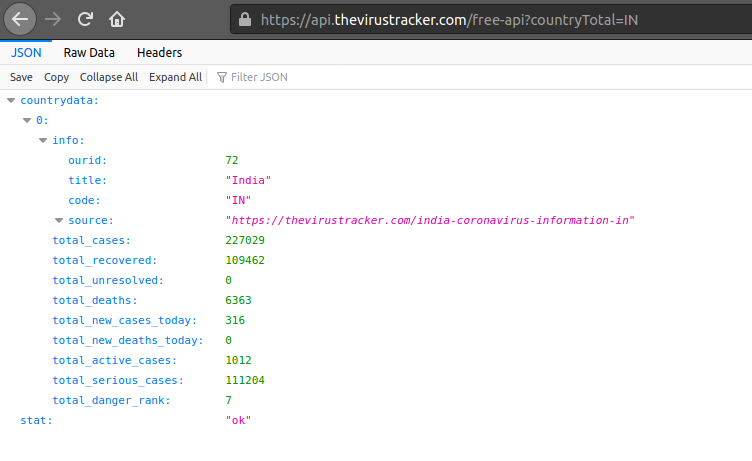
https://api.thevirustracker.com/free-api?countryTotal=IN
This will be the link to which we will make a GET Request to.
Here you can replace ‘IN’ with the country code of your choice. The list available countries are given here.
To view the contents you can directly open the link and look at all the provided data. The API returns a JSON object from which we can get the required info.
Tasker:
For the uninitiated, Tasker is an automation app. You create a list of actions, called a task, which can then be executed according to a variety of contexts.
If this is your first time using tasker, I suggest you get familiar with it’s functionalities first.
Creating the tasks:
For the widget to work, you’ll need to create 2 tasks.
One to get the data and the other to display the scene(widget).
The second task will be created after making the scene.
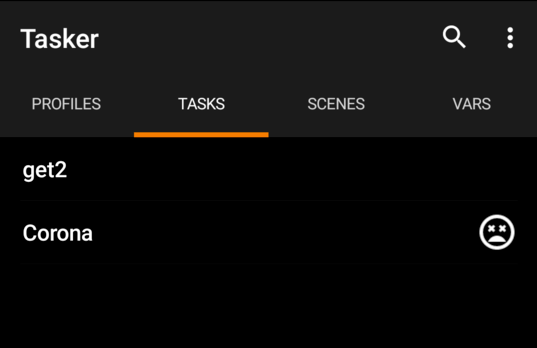
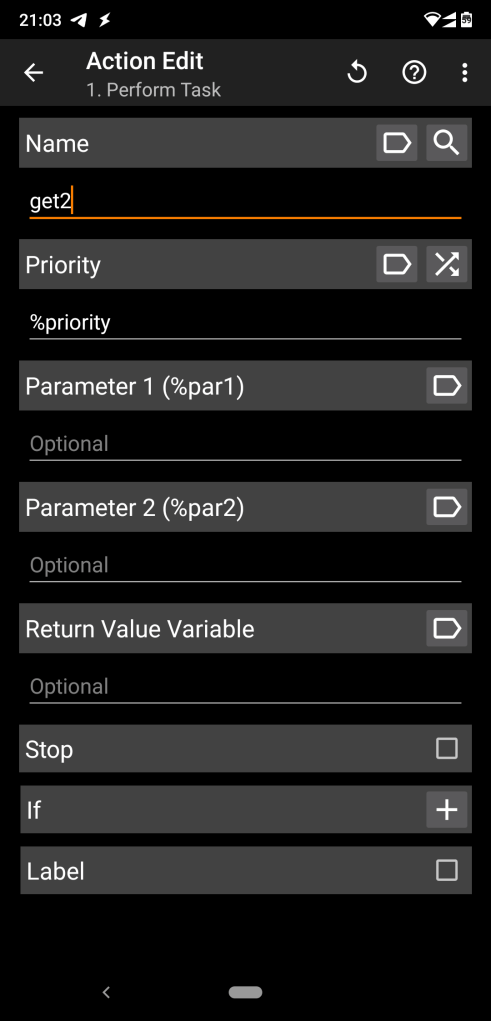
The ‘get2’ task collects the data from the API and the other task is used to display the scene.
Task 1:
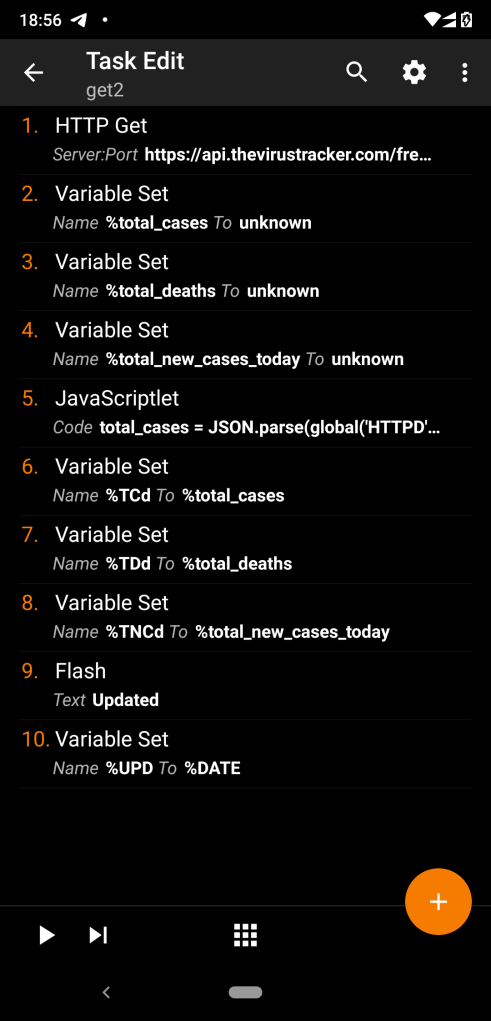
- Create an HTTP get action (Net -> Http Get) from the task edit screen.
In the Server: Port field put the following link:
https://api.thevirustracker.com/free-api?countryTotal=IN
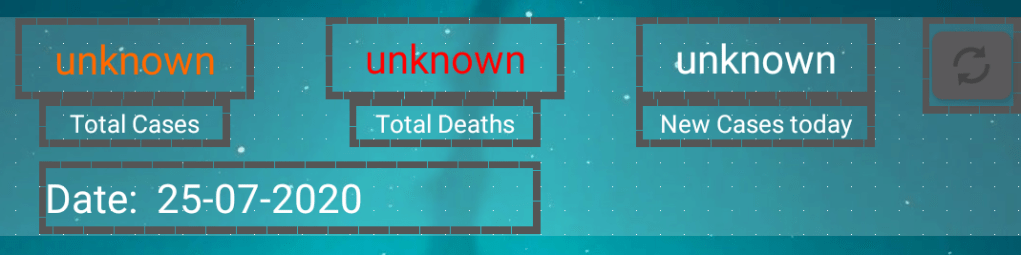
Change the country as needed. - For this widget I want to display 3 fields of data:
– Total cases
– Total deaths
– Total new cases today
So I will create 3 variables to store the 3 different data.
To create a variable add a new action from the task edit screen.
(variables -> variable set). Name them accordingly and set the value to unknown. - The third action is a JavaScriptlet (Code -> JavaScriptlet).
In the code section paste this. Make changes according to the data you need.
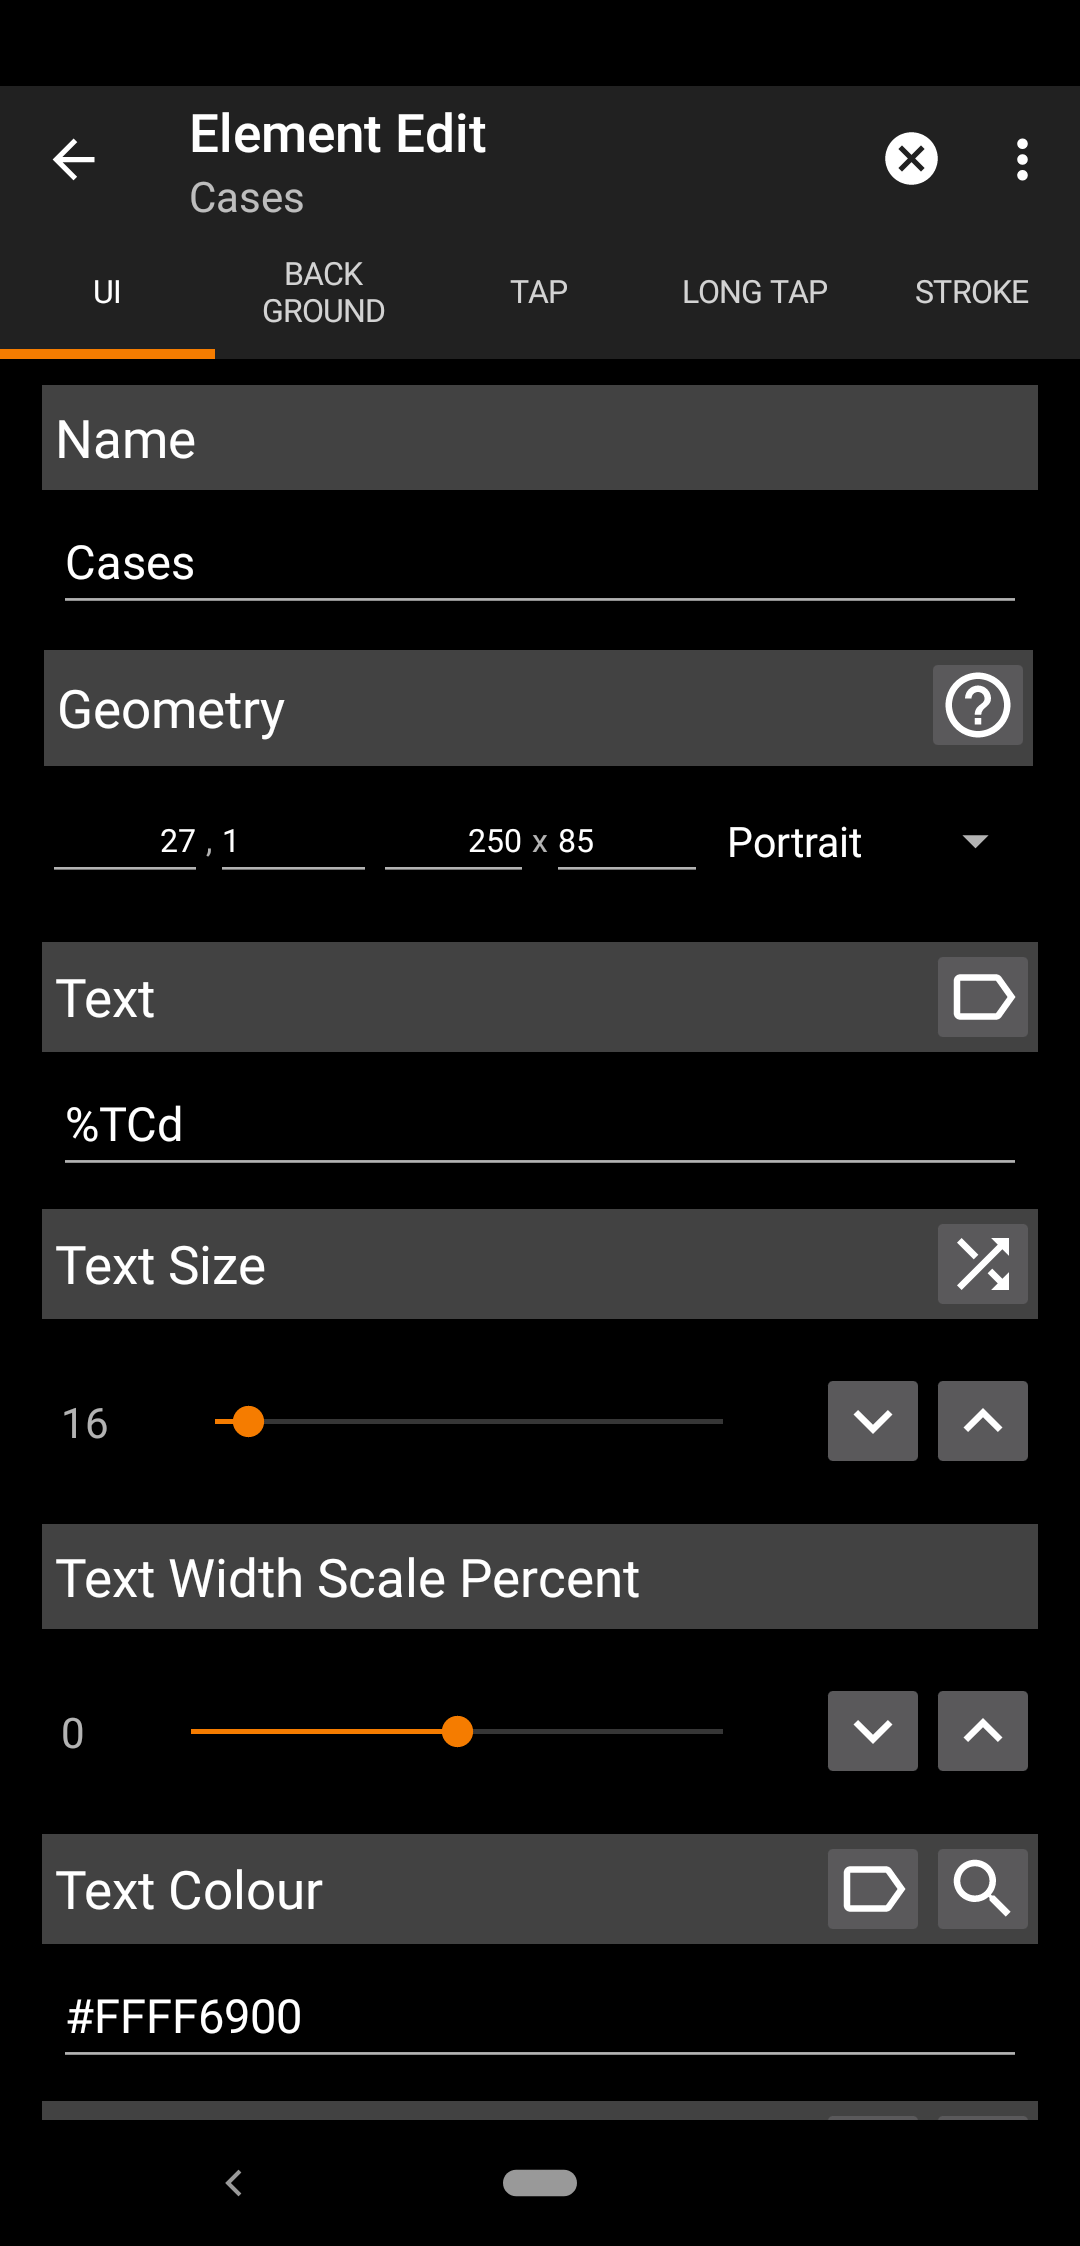
total_cases = JSON.parse(global('HTTPD')).countrydata[0].total_cases;
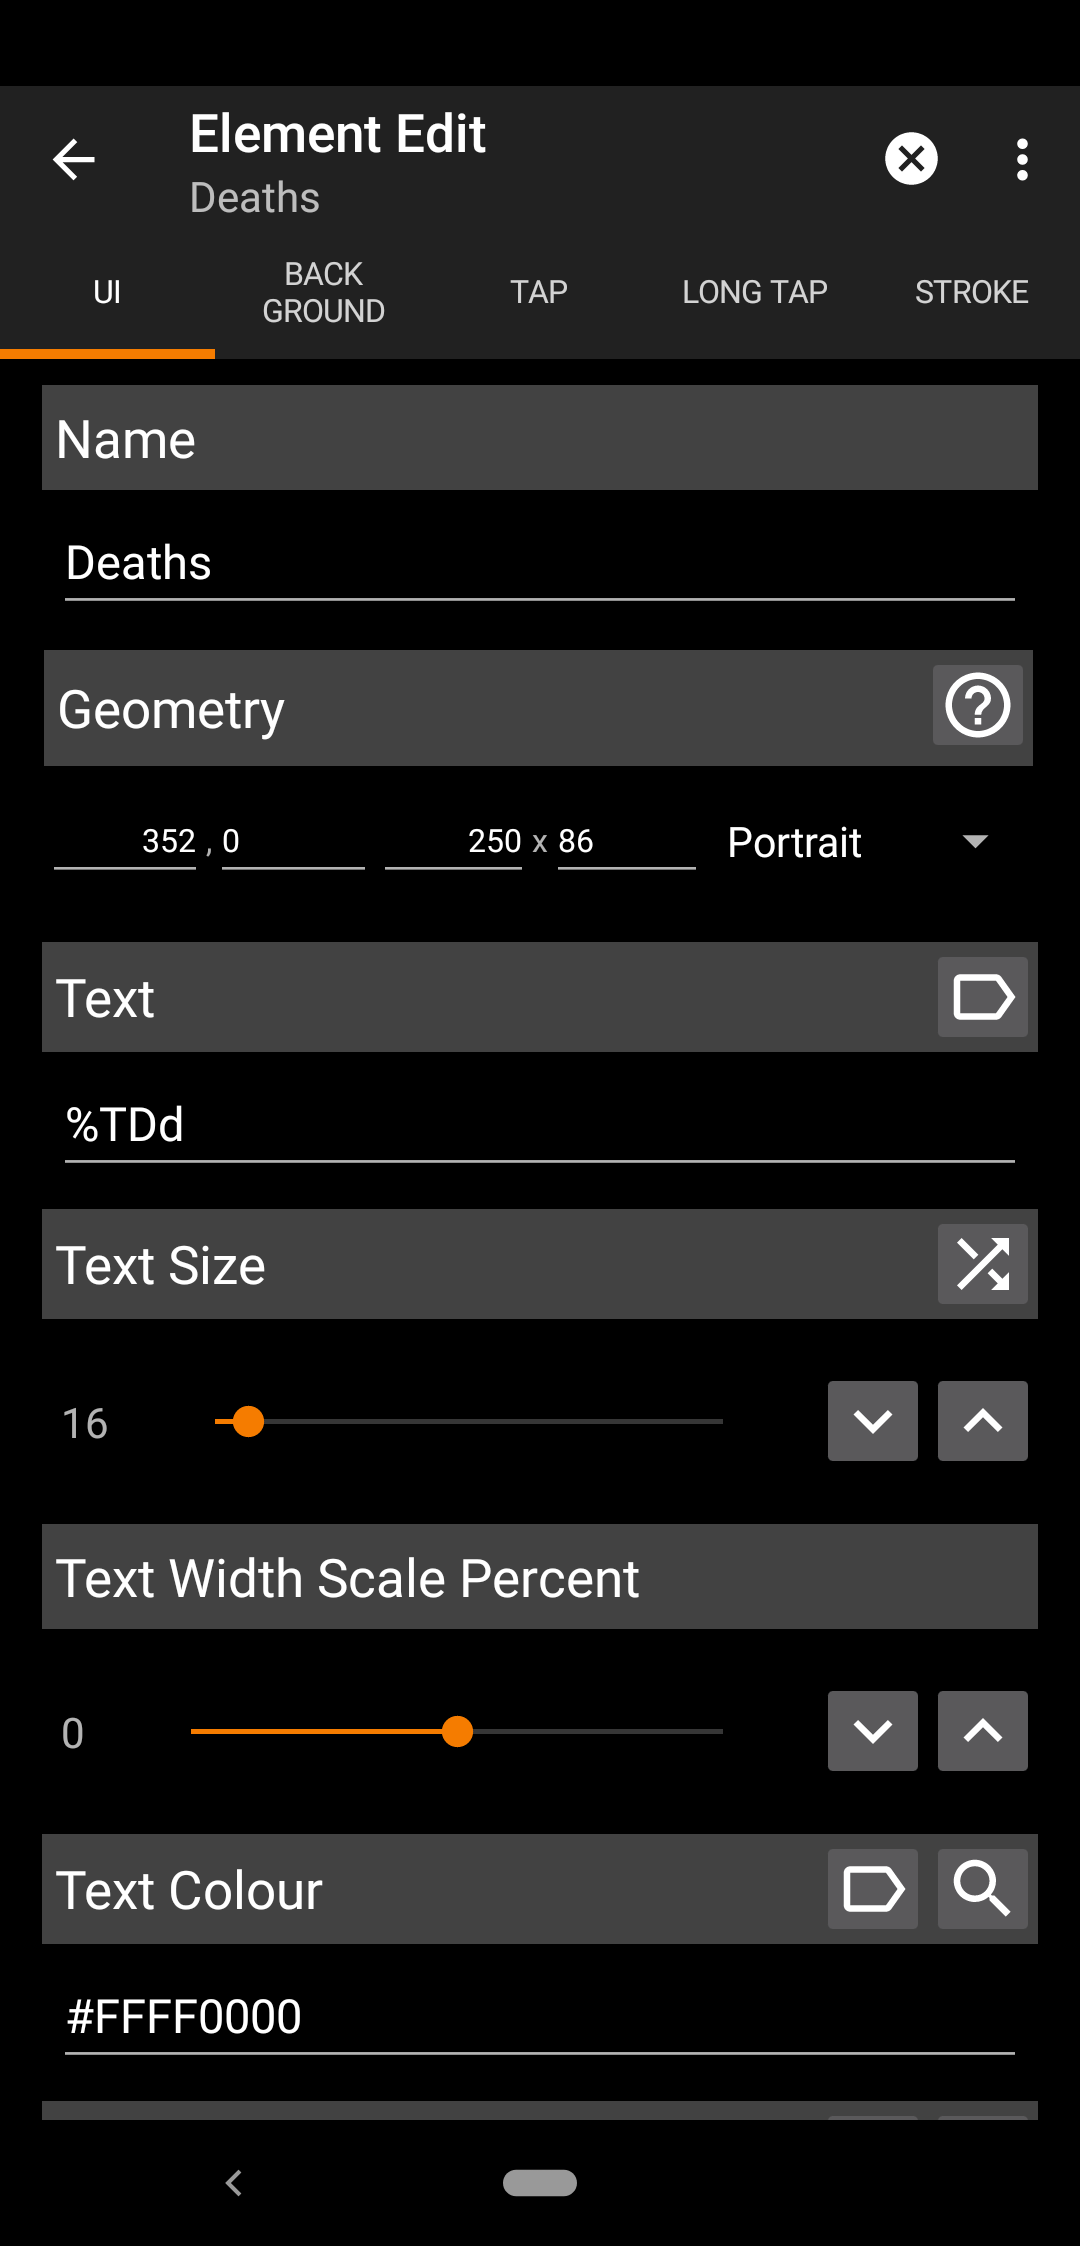
total_deaths = JSON.parse(global('HTTPD')).countrydata[0].total_deaths;
total_new_cases_today = JSON.parse(global('HTTPD')).countrydata[0].total_new_cases_today;
4. Create 3 more variables similar to step 2 but this time the variable names should begin with uppercase letters. These are global variables in Tasker and can be accessed by other tasks. Set each of the values to the 3 variables created in step 2. Refer the example below.
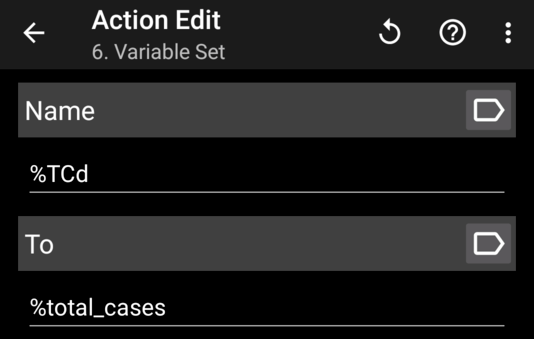
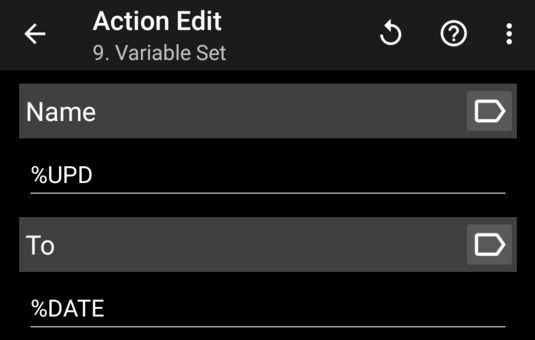
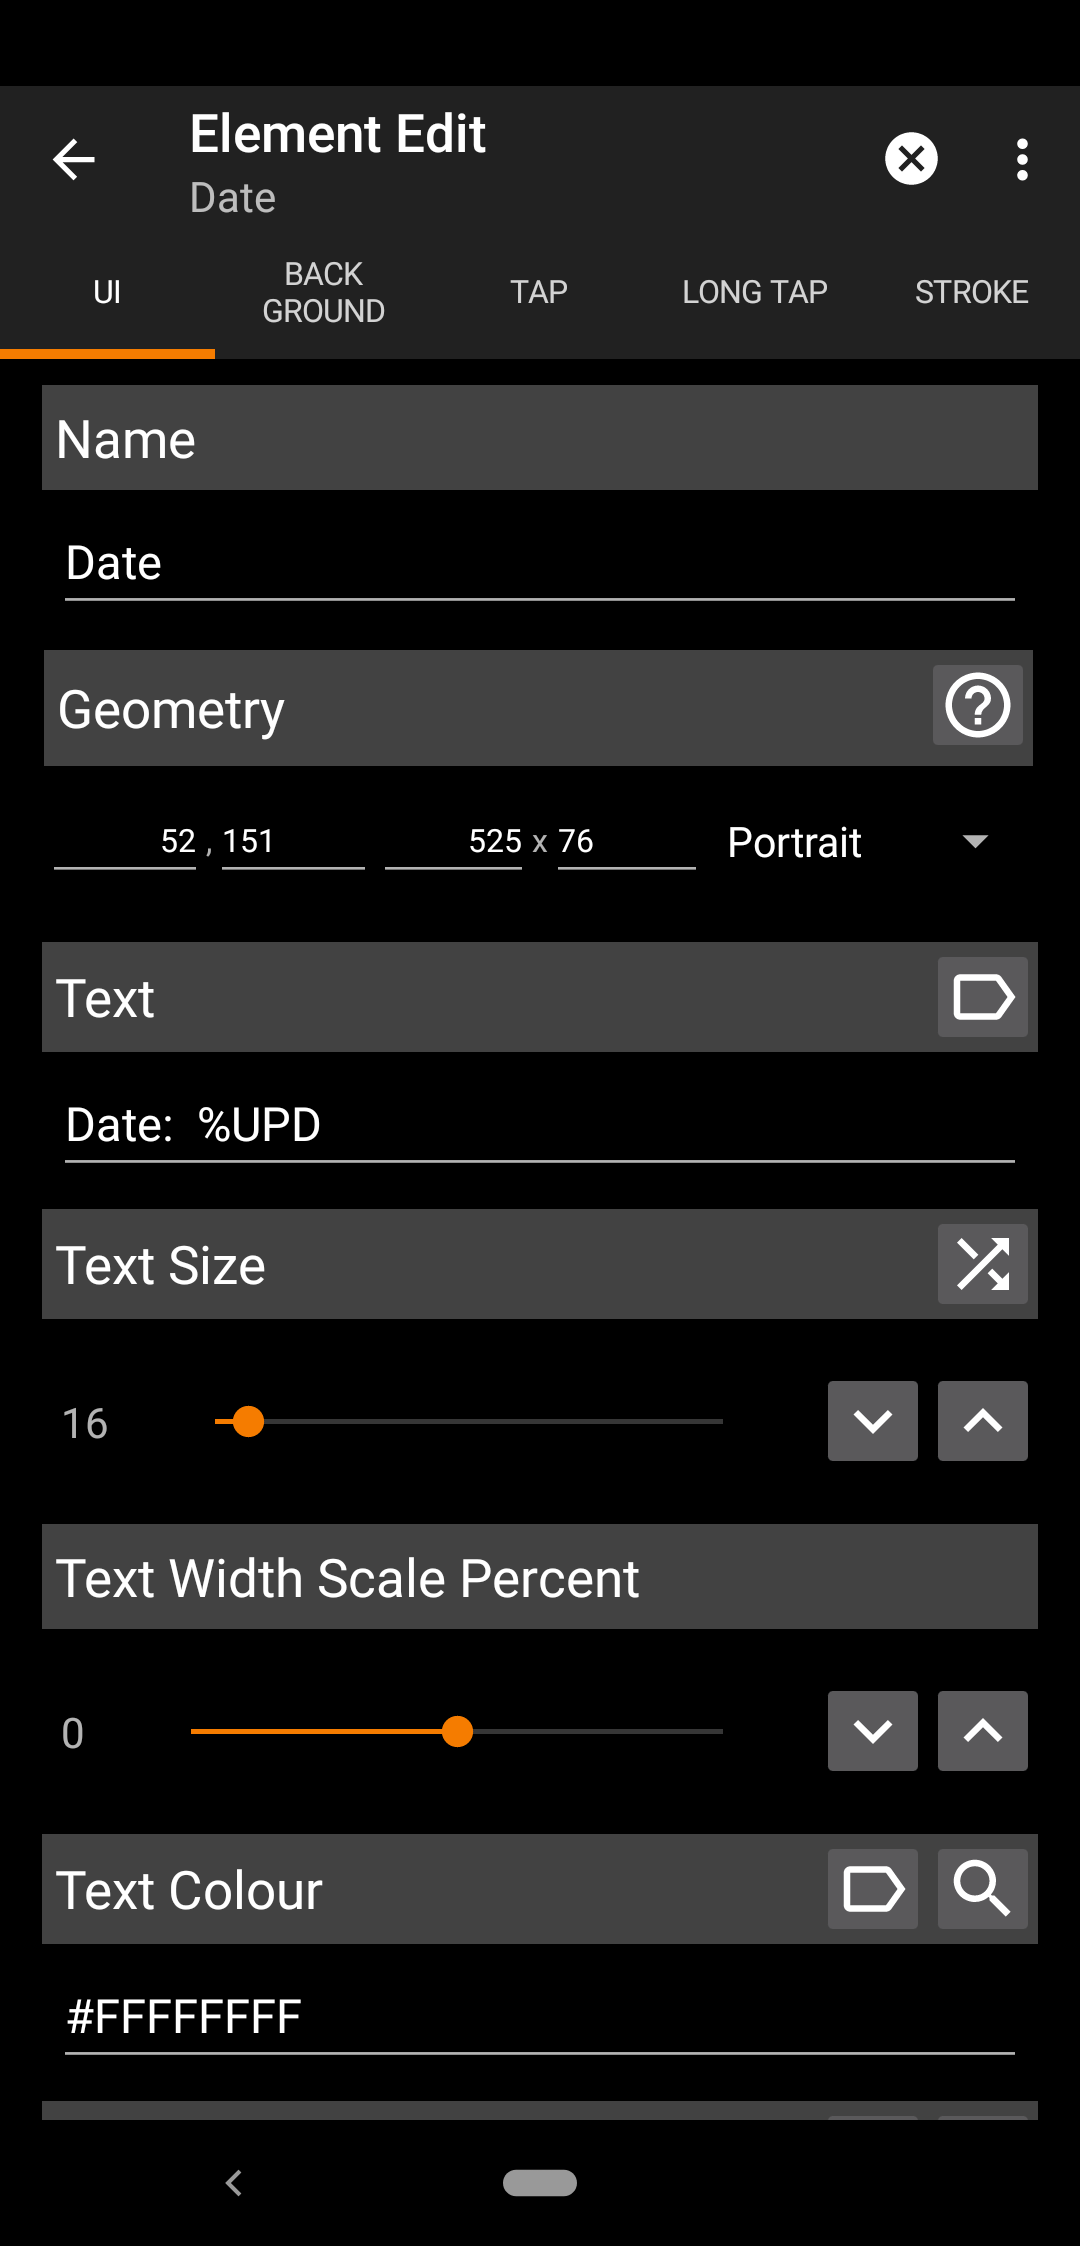
5. Create another variable, this will be used to store the date.
Set this variable to %DATE (This is a variable defined in tasker and holds the current date).
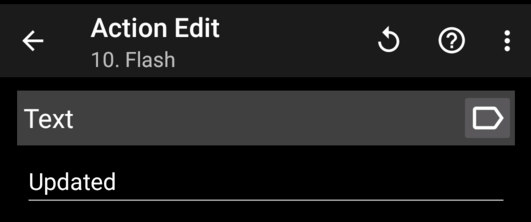
6. This is an optional step to create a toast with the text ‘updated’ to show that the task has finished executing. For this, create a Flash action (Alert -> Flash)
Making the scene:
- From the Scenes tab, create a scene and give a name you like. I named it ‘Disp_data’.
- Now now the set the size of the scene/widget.
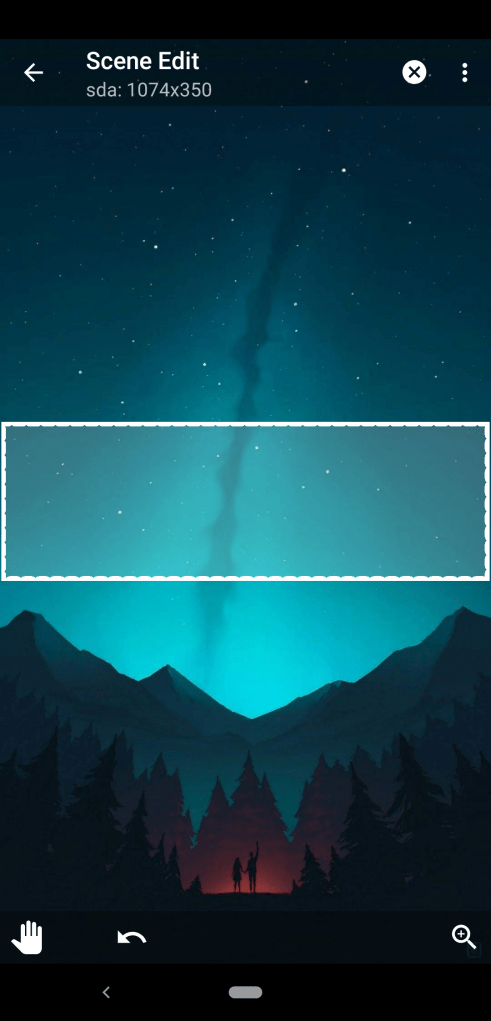
- Click on the magnifying lens icon at the bottom left.
- Now you’ll see a ‘+’ button at the bottom. Click on that to start adding elements to the scene.
- For this widget we only require text elements and a button.
- When you add an element you are taken to the element edit screen.
Here, the 3 important fields are Name, Geometry and Text.
– Set the Name field to whatever you like (ideally to represent what will be shown in the textbox).
– The geometry will be set automatically when you resize the element.
– Set the Text field with the Global variables created earlier.
– You can also set the text color if you like to. (use hex) - Set the size of the element.
- Create rest of the textboxes

- Lastly, add a button. This will be used to update the widget.
You can set the task to run at a set frequency which will ensure updated data whenever you open the widget, but I didn’t do it to avoid unnecessary calls to the API.
– Set a name for the button
– Scroll down to set an icon for the button.
– Go to the ‘TAP’ tab and add a task. (Task -> Perform Task)
– Set the ‘Name’ field to the name of the 1st task (you can use the search icon to see a list of all the tasks).
And you are all done with creating the scene. Now to make the 2nd task as mentioned in the beginning.
Task 2:
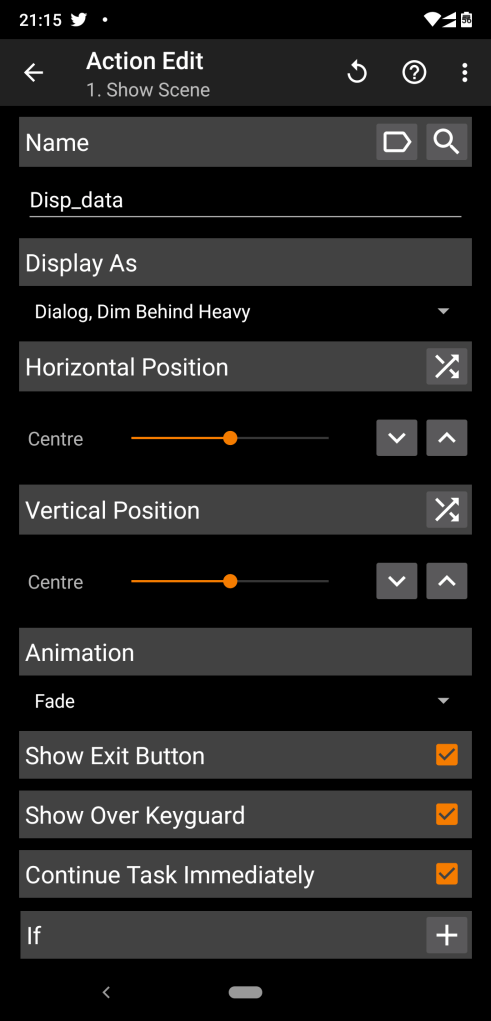
- Create a new task to display the scene just created. (Scene -> Show scene).
- Set the ‘Name’ to the name of the scene you just made(Click the search icon to view all scenes).
- Set ‘Display As’ to ‘Dialog, Dim Behind Heavy’
- Set the Horizontal and Vertical Positions as you like. I set them to center.
- Set animation to ‘Fade’
- Tick the following:
– Show Exit Button
– Show Over Keyguard
– Continue Task Immediately
Now you can test it out by running the 1st task and then running the 2nd task. If everything worked you should see the the widget pop up.
Adding to home screen:
To open the scene/widget from the home screen add a tasker task widget from your launcher’s menu.
Select the 2nd task you created. This will create an icon on the home screen which will open the scene/widget.
And that’s it!!!
